
Introduction
In this tutorial, we will cover the process of setting up a simple ‘Hello World’ website using Apache and then analyze the HTTP request using Wireshark.
1. Setting Up Apache Web Server on Ubuntu
Before we get started, we should make sure to update the package list by sudo apt update
1.1 Installing Apache:
sudo apt install apache2
1.2 Starting Apache service:
sudo systemctl start apache2
After installation, the Apache service should start automatically. We can check its status with:
sudo systemctl status apache2

and to stop and restart the service:
sudo systemctl stop apache2
sudo systemctl restart apache2
1.3 Hosting a ‘Hello World’ Webpage
A simple “Hello World” webpage was created and saved as index.html in the Apache web server’s default directory:
sudo mousepad /var/www/html/index.html
The content of the index.html file was as follows:
<!DOCTYPE html PUBLIC "-//W3C//DTD XHTML 1.0 Transitional//EN" "http://www.w3.org/TR/xhtml1/DTD/xhtml1-transitional.dtd">
<html xmlns="http://www.w3.org/1999/xhtml">
  <head>
    <meta http-equiv="Content-Type" content="text/html; charset=UTF-8" />
    <title>Apache2 Ubuntu Default Page: It works</title>
    <style type="text/css" media="screen">
  * {
    margin: 0px 0px 0px 0px;
    padding: 0px 0px 0px 0px;
  }
...
I edited it to be like:
<html>
<head>
<title>Hello World</title>
</head>
<body>
<h1>Hello World</h1>
</body>
</html>
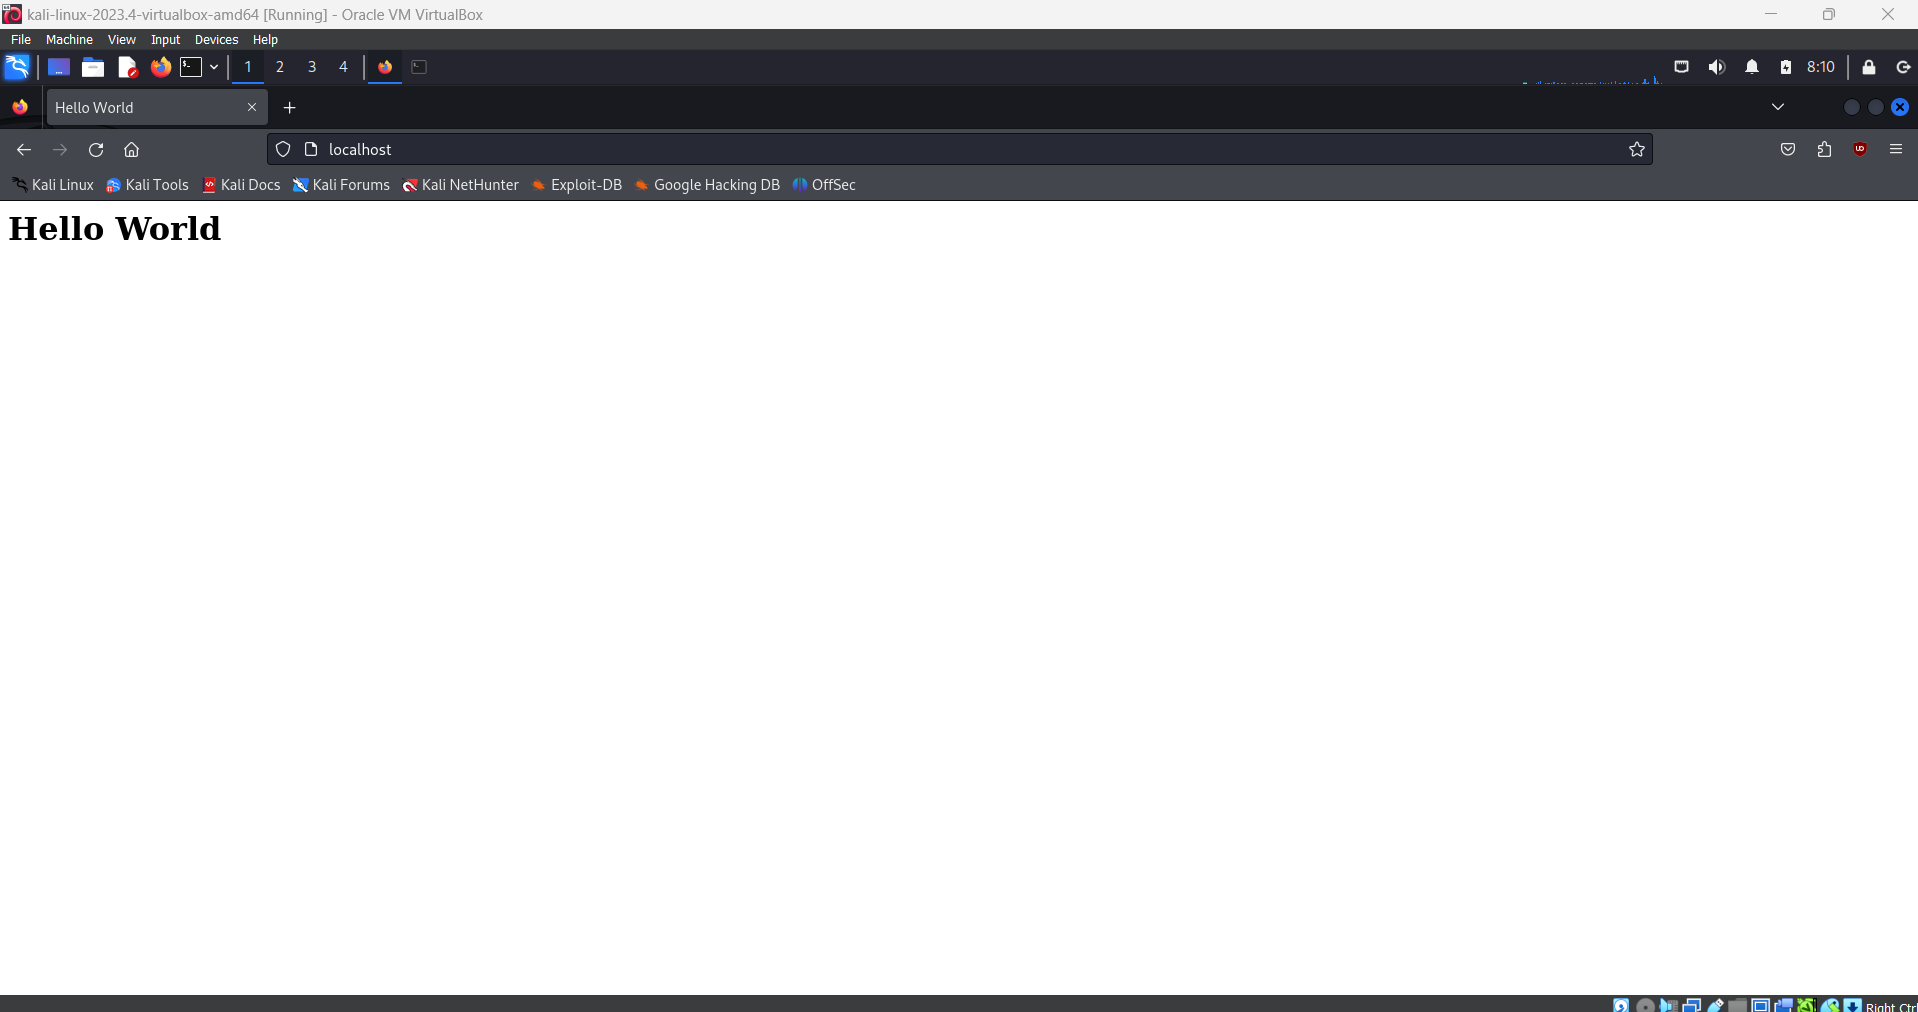
The web server was verified to be running correctly by accessing the webpage locally on the Kali Linux machine via http://localhost/.
2. Accessing the Website from Windows Host Machine
2.1 Network Configuration
- The Kali Linux VM was configured to use a Bridged Adapter in VirtualBox, allowing it to be on the same network as the Windows host machine. This ensured that the VM had its own IP address that could be accessed from the host.
2.2 Finding the IP Address
-
The IP address of the Kali Linux VM was obtained using the command:
ip a -
The IP address was identified as
192.168.1.10.
2.3 Accessing the Webpage
-
On the Windows host machine, the
Hello Worldwebpage was accessed using a web browser by navigating tohttp://192.168.1.10/.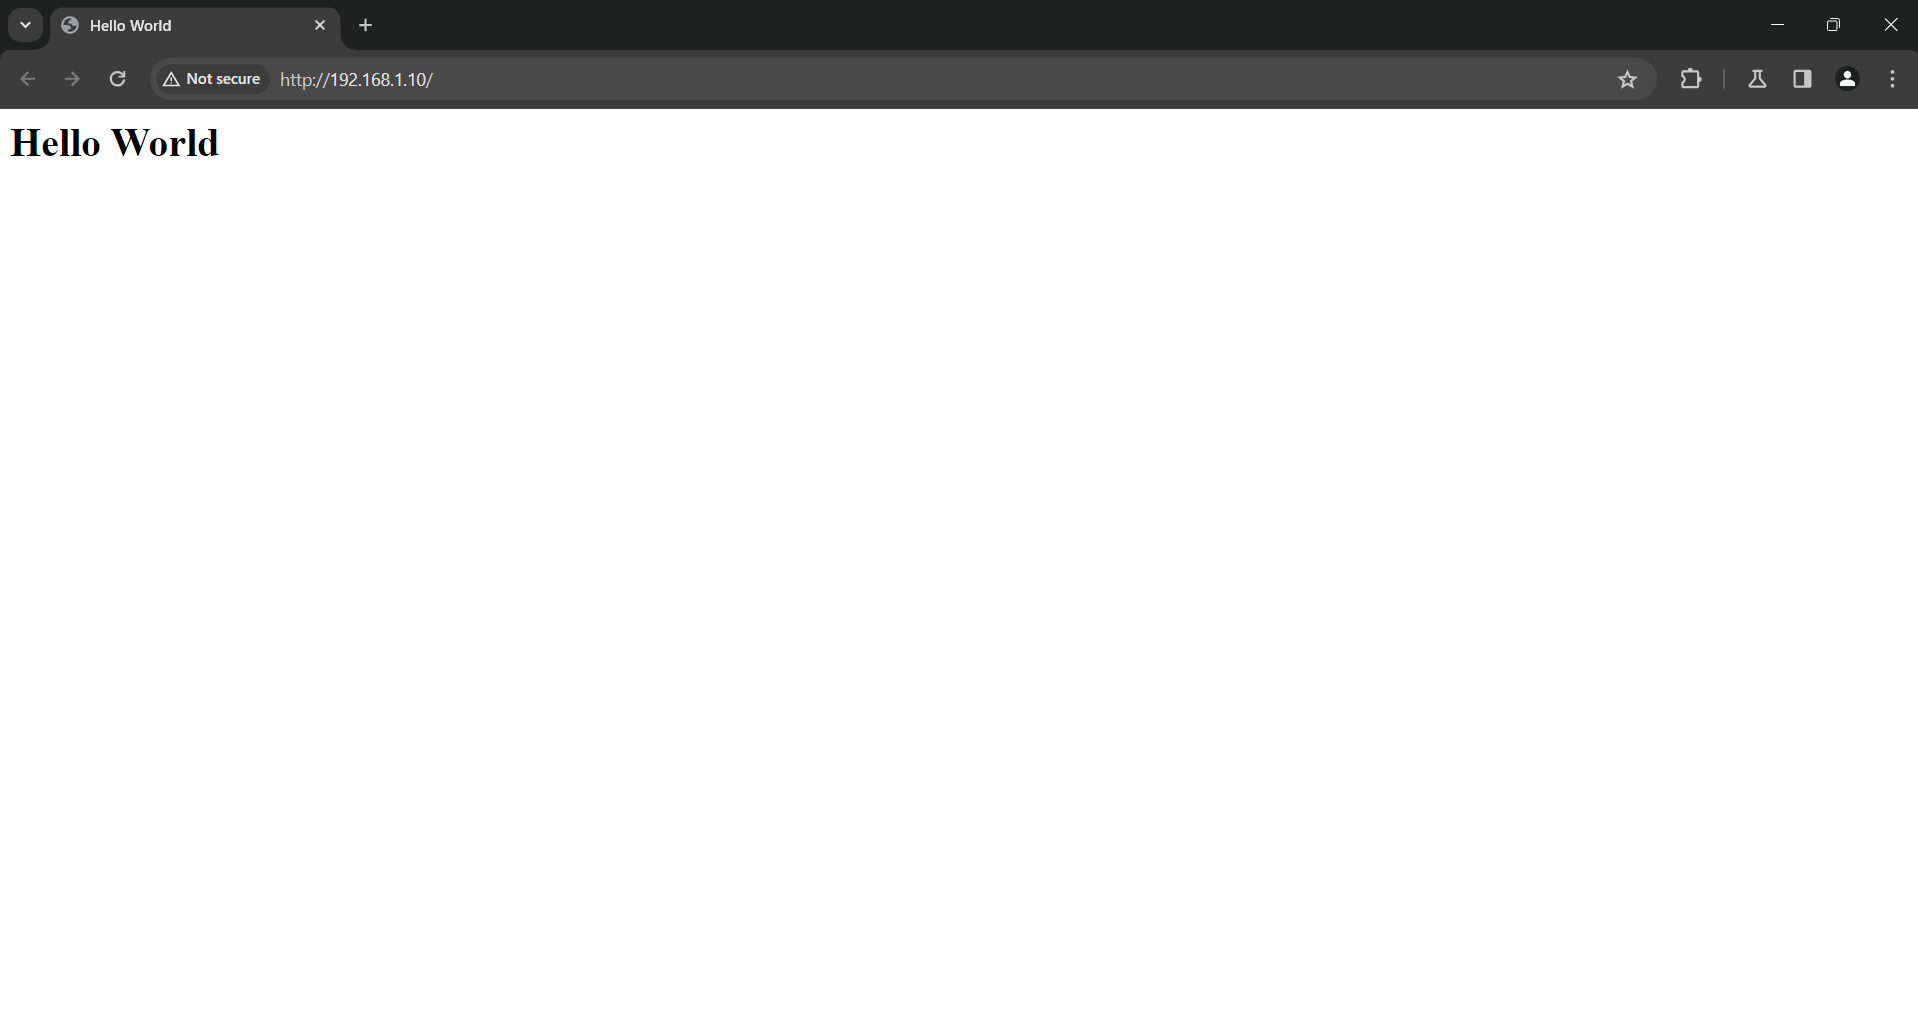
3. Analyzing HTTP Protocol on Windows
3.1 Initial Wireshark Setup
- Wireshark was installed on the Windows host machine to capture and analyze the HTTP traffic.
- The network interface connected to the same network as the Kali Linux VM was selected for capturing.
3.2 Troubleshooting HTTP Traffic Capture
- Issue Encountered: Initially, no HTTP traffic was captured when accessing the webpage from the Windows browser.
- Steps Taken:
- Cleared the browser cache on Windows to force the browser to reload the page from the server.
- Ensured that the browser was explicitly using
http://and not redirecting tohttps://. -
Attempted to generate traffic using the
curlcommand in Command Prompt:curl -v http://192.168.1.10/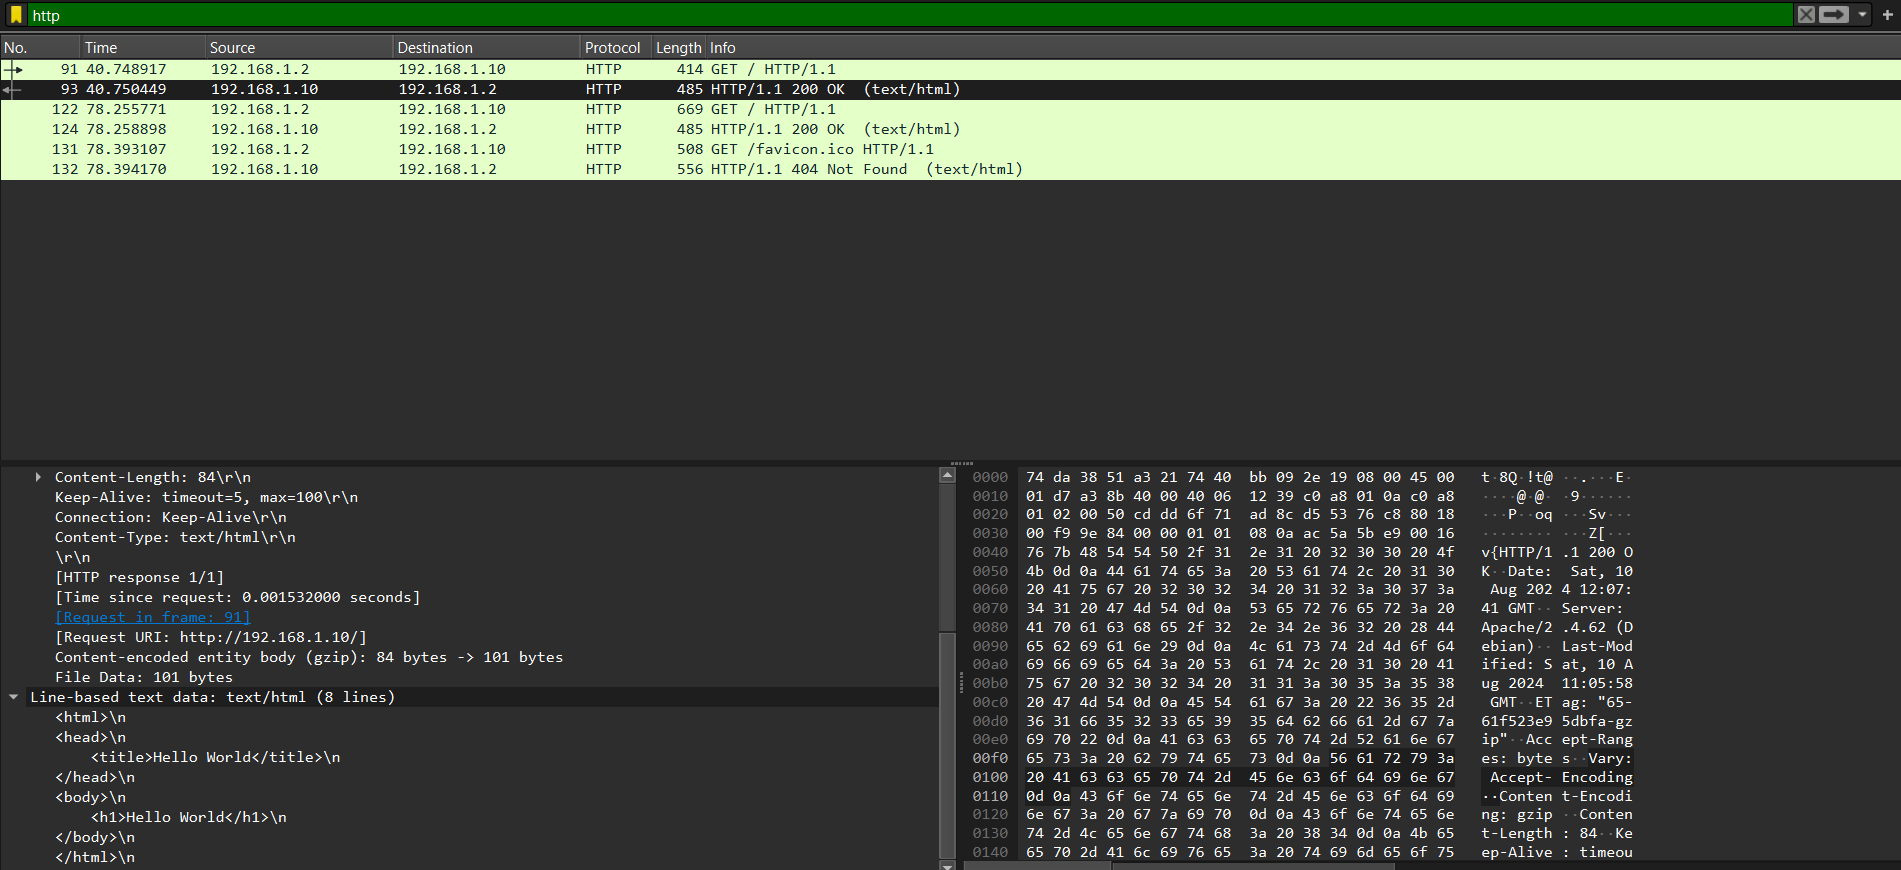
Despite these efforts, Wireshark still did not capture HTTP traffic from the Windows host.
3.3 Successful Capture Using an Android Device
- Alternative Approach: HTTP traffic was successfully captured when accessing the webpage from an Android device connected to the same network as the Windows host and the Kali Linux VM.
- The HTTP GET requests and responses were visible in Wireshark, confirming that the web server and network configuration were functioning correctly.
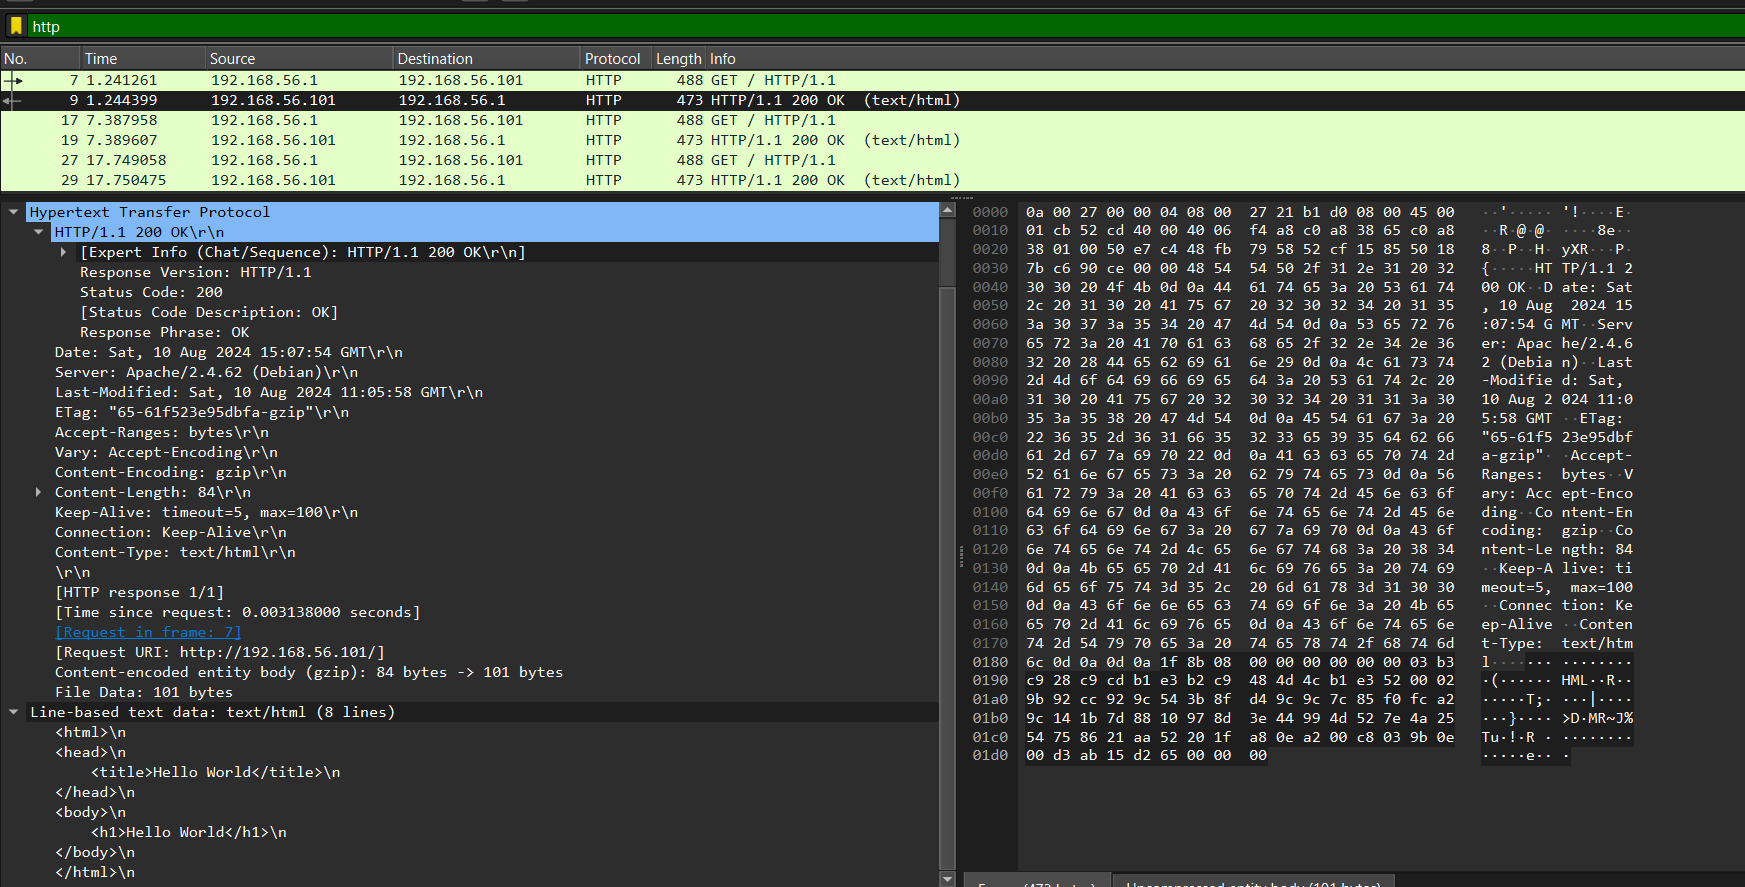
3.4 Final Resolution: Configuring the network settings
- Another way is to configure the network settings in VirtualBox from Bridged Adapter to use a Host-Only Adapter and selecting the corresponding Ethernet interface in Wireshark.
- The IP address was identified as
192.168.56.101. - Ensuring that the correct network interface (Ethernet) was selected in Wireshark.
-
Once the correct Ethernet interface was selected in Wireshark, HTTP traffic generated from the Windows host was successfully captured.
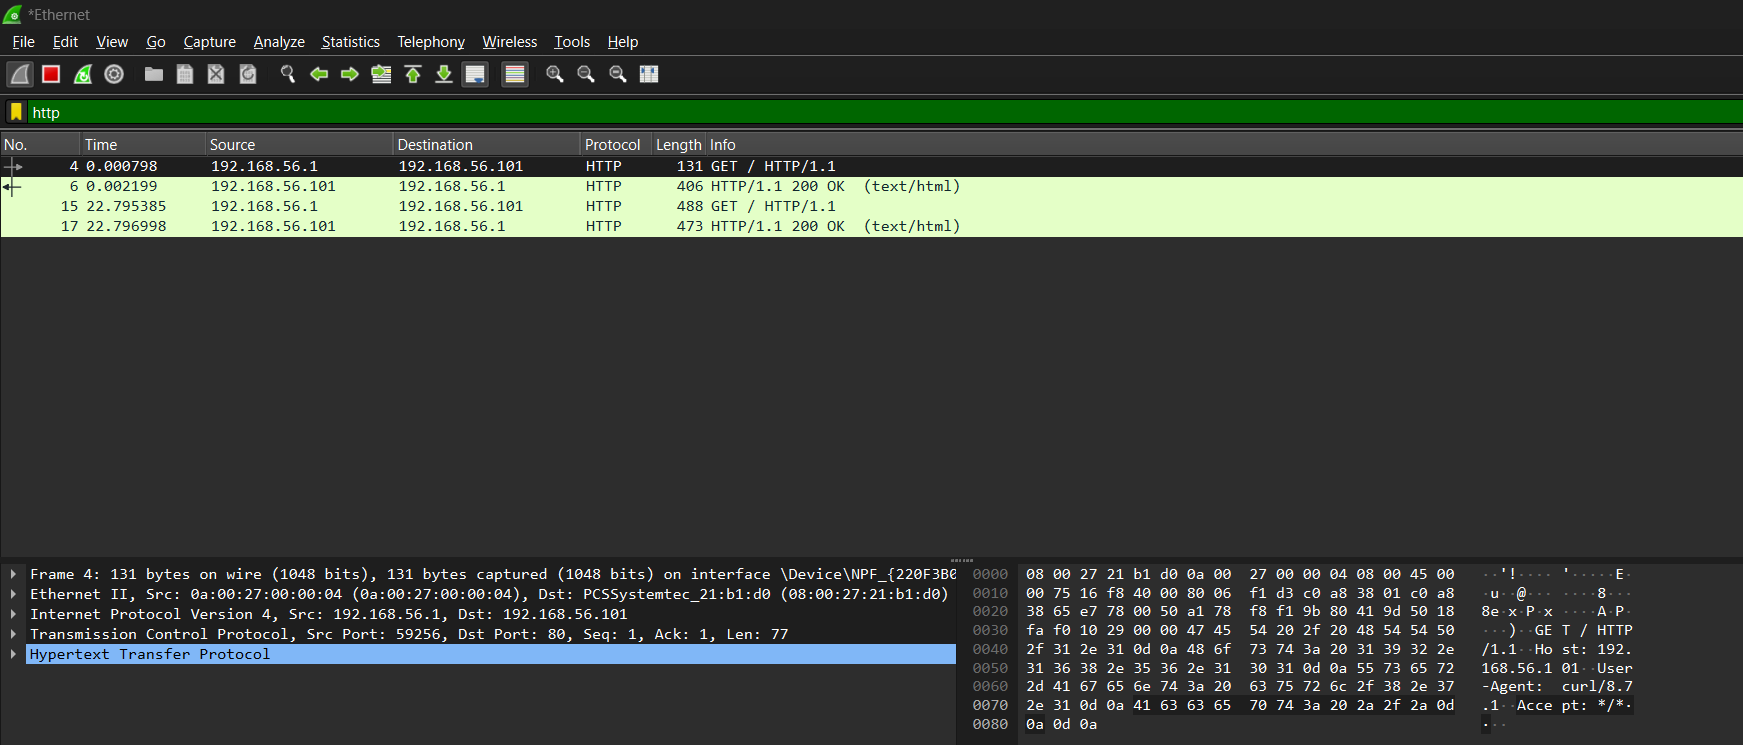
Ethernet interface
3.5 Analysis of Captured HTTP Traffic
- Captured Traffic:
- The HTTP GET request to
index.htmlwas observed, showing the request method, path, HTTP version, and headers such asHostandUser-Agent. - The HTTP 200 OK response was also observed, containing headers like
Content-Typeand the body of the HTML page.
- The HTTP GET request to
4. Wireshark HTTP Traffic Capture
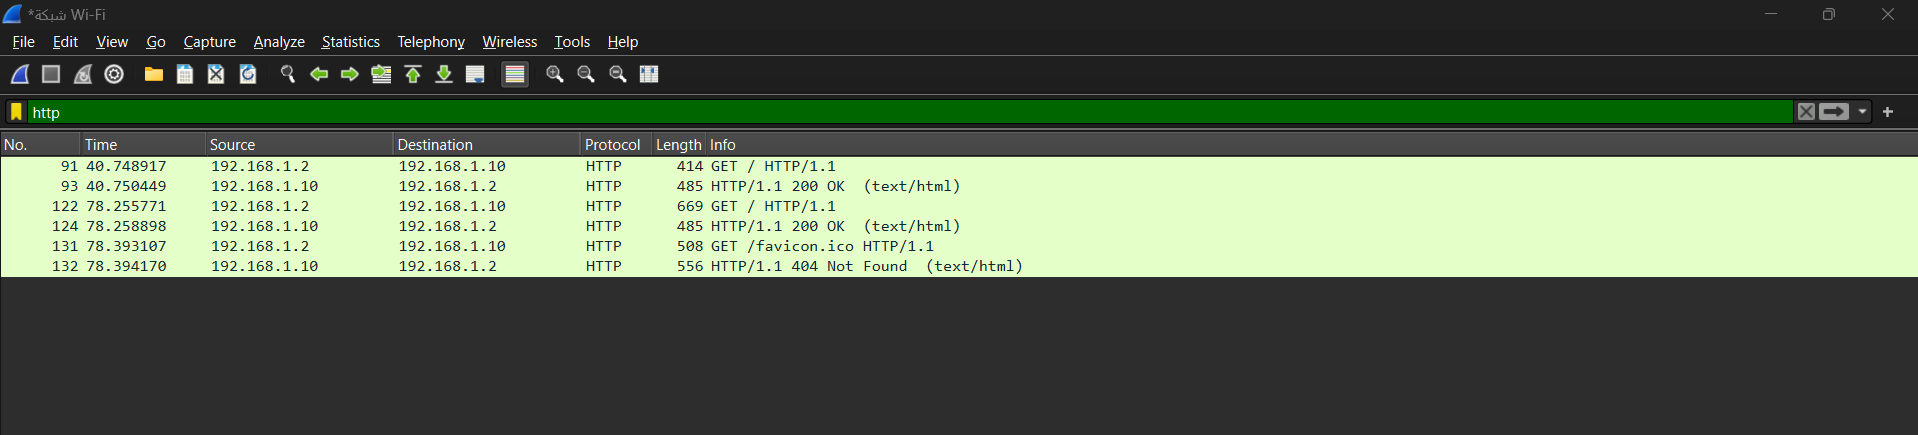
Screenshot of Wireshark capturing HTTP traffic
4.1 Android user agent:
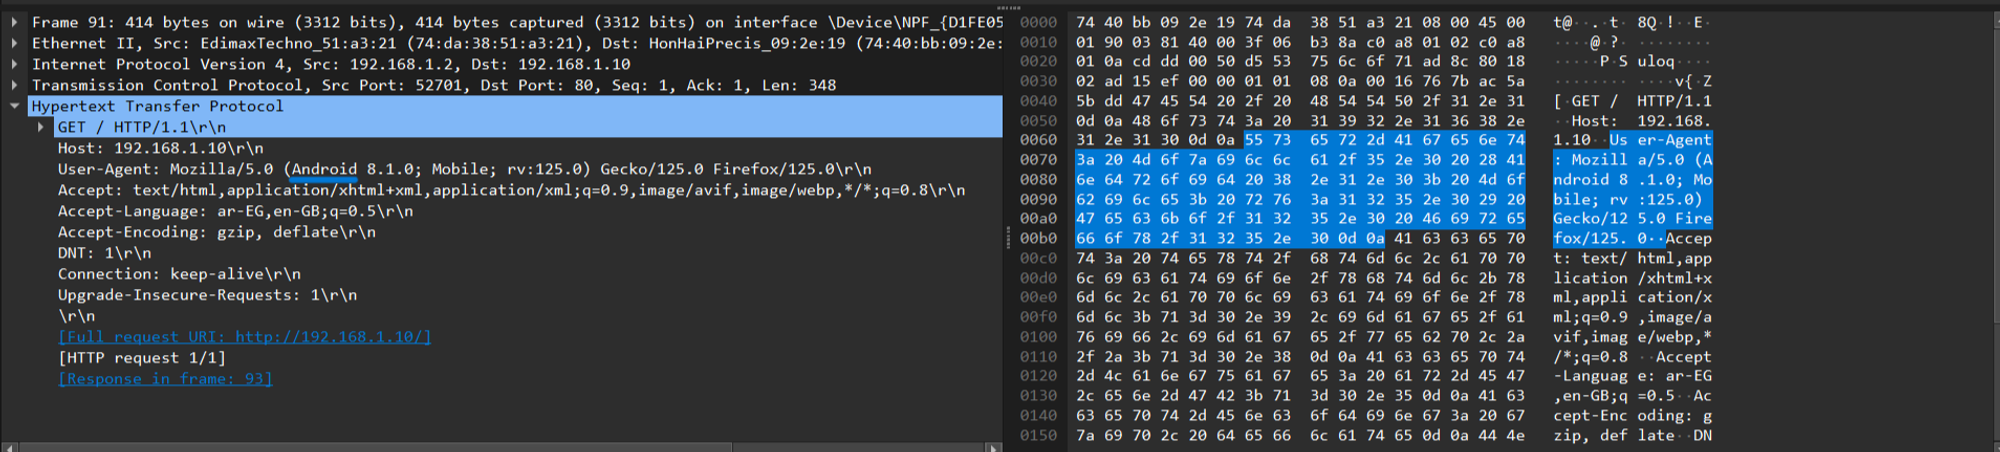
Screenshot of HTTP GET request packet

Screenshot of HTTP response packet
4.2 Windows user agent:

Screenshot of HTTP GET request packet
Screenshot of HTTP response packet
Resources
how-to-install-the-apache-web-server-on-ubuntu-20-04
6.2. Introduction to Networking Modes: https://www.virtualbox.org/manual/ch06.html